... about ... what's new ... how to ...
Showing posts with label robinde. Show all posts

Thursday, November 5, 2009

small blue quilt

I finally finished one of many partially completed sewing projects. It is a small quilted wall-hanging made using the method shown in this great tutorial. It was easy and quick to make the small strip log-cabin-style blocks with this method. The challenge was trying to get them to fit together in rows that were aesthetically pleasing, and then the rather laborious job of quilting each block. This was a fun way to use up a few colorful scraps, and I tried to challenge myself by using only scraps and not cutting into any large pieces. If I make another one of these quilts, I'd like to try a simpler, more freeform type of quilting (all-over wavy lines or stipple quilting) instead of the straight line quilting that I used. By the way, the size of the finished mini-quilt is about 15 x 20 inches.

Wednesday, August 26, 2009

Spoonflower fabric designs

I recently came across a website called Spoonflower.com, which enables people to upload and print their own fabric designs. Instead of working on my numerous sewing projects, I've been obsessively experimenting with fabric ideas in Photoshop, trying to figure out how to make things tile. I ordered a few of my designs on small test swatches on the Free Swatch Day last week, and am looking forward to seeing the fabric.

Here is one design based on a drawing I made of ginkgo leaves: ginkgo-pink

Monday, May 25, 2009

photowhispers: 12.08-05.09

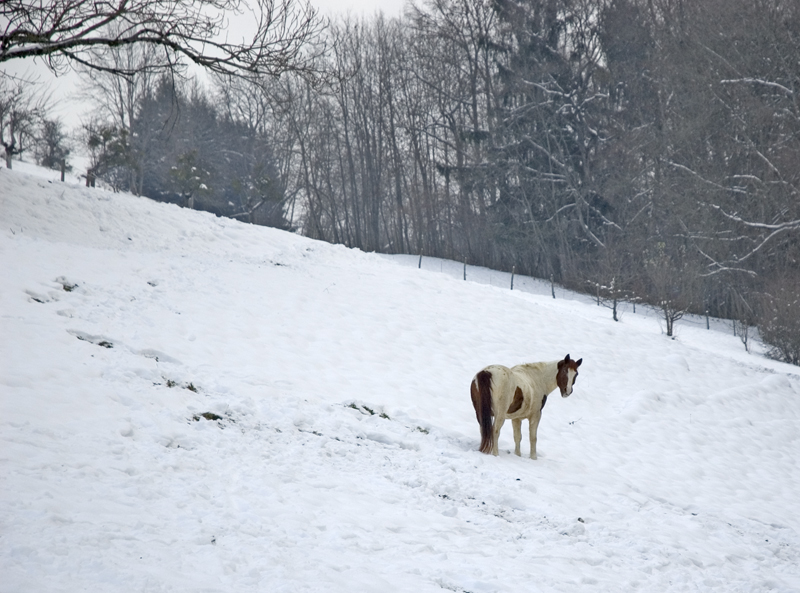
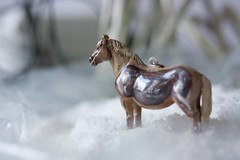
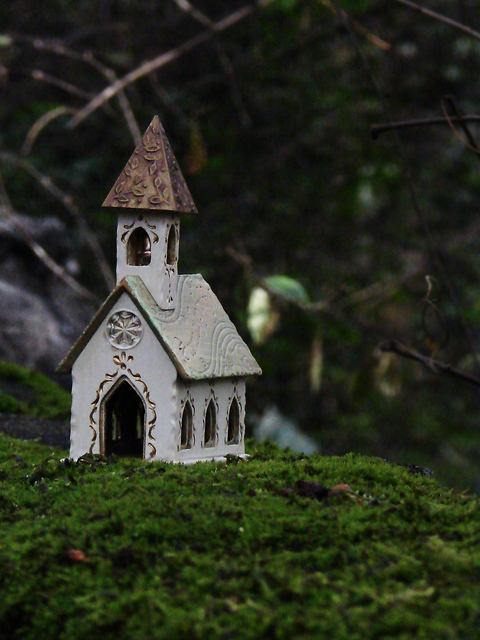
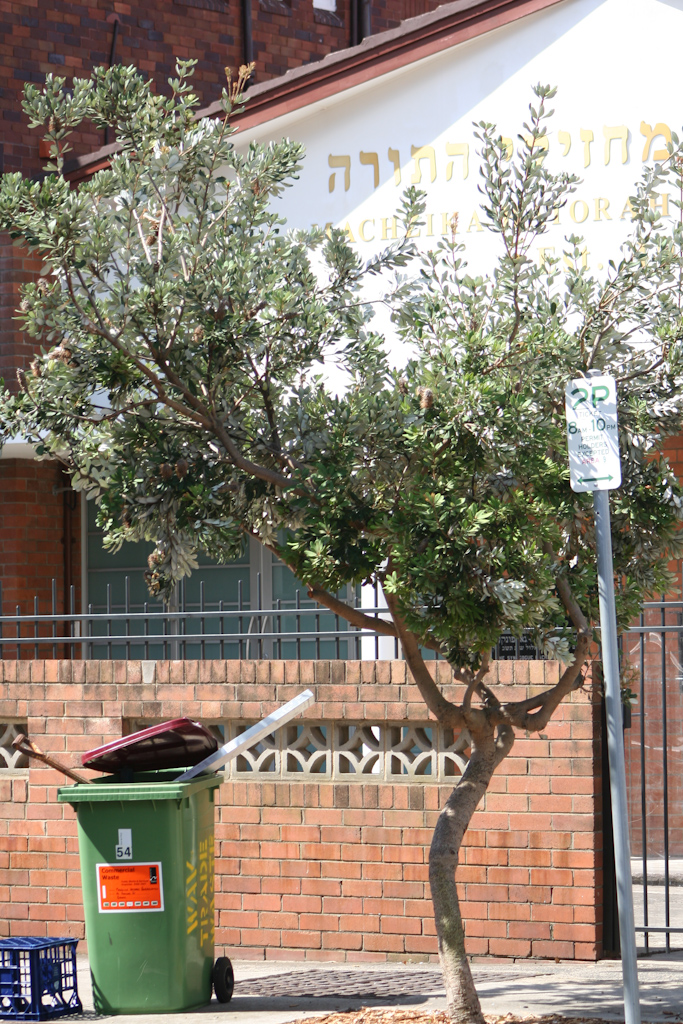
here are the results of the photowhisper chain that we did. each person had a week to complete a photo and pass theirs along to the next person. due to unforeseen circumstances, the project took much longer than we anticipated, but better late than never, right? mouse over each photo for photographer and caption.

by joanna: I was thinking of the playful horse who seemed to be enjoying the solitude.  He looked as if telling me "what are ya looking at?" and didn't wanted to be bothered. by cignoh: I saw isolation in Joanna's photo. I wanted to make a literal representation using a horse keychain that has its innards exposed and some fake snow that my husband had just bought. I tried to convey the mood of the original---a winter day with a stark background and cool diffuse lighting. Because of limitations with the setup, I had to focus in closer to the horse, but I kind of liked that effect that we are focusing on it. I also liked the fact that he is exposed. by robinde: I liked how Cindy used objects that were not real (the horse and the snowy backdrop) and imbued them with a magical realism in her photo. I tried to create a similarly unreal scene with a small toy submarine in my kitchen sink. I had difficulty photographing the water, so I used Photoshop to alter the look of the water and make it look somewhat icy. by sukogirl: From Robin's photo, I guessed the theme to be taking a miniature object and photographing it in such a way that the object seems life-size. I wanted to photograph the church (x-mas ornament) so that it looked like it was built on the edge of a cliff. by amy.gunson: Atsuko's picture made me think of the contrast of religion and daily life with his girl rushing by the small church. Seeing the garbage and parking sign out front of the jewish synagogue, gave me the same feelings about fitting religion with daily life. by willo: freedom by lanaconqueso: I liked that it had a sense of isolation to it, and he looked very free. So that's sort of what I was trying to do with my photo. Even though there were a lot of other people around it was wide enough of a space that I could frame it and make it look like Greg was the only one there.

Thursday, May 1, 2008

yet another hyperbolic crochet plane

This is my first circular crocheted hyperbolic plane, made from a skein of inexpensive purple acrylic yarn (256 yards, Red Heart Soft brand). The crocheting was very repetitive, but it was neat to see the ruffles start to emerge as the shape got larger and larger. I increased one stitch for every 4 stitches. As you would expect, it does not seem to be as tightly ruffled as cignoh's plane which increased one stitch every 3 stitches. This piece is about 12 inches across and can be arranged in a variety of different ways to resemble coral or lettuce. It also makes an interesting hat.

Wednesday, April 23, 2008

dyed yarns and more crochet

For the past week, I've been experimenting with dying yarn in the microwave. It is very simple to dye wool yarn or wool roving using food dyes. You can use cake/icing dyes or food coloring or even Kool-aid packets. I like to use Wilton gel dyes (meant for cake decorating), because a small amount of gel goes a long way.

First I soaked the yarn in a mixture of vinegar and water. The vinegar acts as a mordant and helps the dye bind to the wool. I used a microwave-safe ceramic dish with a cover to hold the yarn and vinegar-water bath. Next, I prepared the gel dyes by mixing them with water in small pyrex cups. For these examples, I mixed up 2 or 3 different shades for each skein. The yellow-orange yarn was made with lemon yellow, golden-yellow, and orange. The bluish yarn was made with royal blue and violet. The lime yarn was made with lemon yellow and leaf green. The darker green yarn was made with teal and leaf green.

I sprinkled the dye on the yarn somewhat haphazardly to give the yarns a variegated look. I covered the dish and microwaved the yarn for around 5-7 minutes until the water bath was clear (meaning that the dye had absorbed into the wool). Then I rinsed the yarn in cool water to get rid of the vinegar smell and hung it to dry. You can also dye larger amounts of yarn on the stove with this basic method, but you have to be careful not to agitate the yarn too much or it can start to felt together. The pink thing in the photo is a hyperbolic crocheted plane made from non-dyed store-bought wool.

Monday, April 14, 2008

crochet sea creatures

For the past few weeks, I've been learning to crochet with the help of my neighbor and YouTube crochet videos and various websites. I started out trying to make a hyperbolic plane, but didn't get very far. It took me awhile to figure out that I was doing a slip stitch instead of a single crochet, and I kept undoing my work because it didn't look quite right.

Meanwhile I started obsessing over the crochet undersea creations featured at The Institute for Figuring and at Helle Jorgensen's Gooseflesh blog. So I started making crochet barnacles (not in picture). This weekend I made lots of crochet tubes and sewed them together to make a crochet tube sponge. The tubes are each about 2-3 inches long and there are 17 of them so far. The sponge measures about 6 inches across. Ian made the green kelpy thing on the right (he wants to add wires to make it stand up). The pink thing on the left is the start of one of my hyperbolic planes. The clownfish were borrowed from a tiny toy aquarium.

Monday, March 24, 2008

egg with squares and lines

This is a smallish duck egg with yellow/orange squares and dotted turquoise lines interwoven between the squares. After I waxed over the squares and lines, I soaked the egg in vinegar for 20+ minutes. Vinegar reacts with the calcium carbonate in the eggshell and slowly dissolves the uncovered parts of the shell. Vinegar etching can be used to create a shadowing effect around the design, unless you accidentally walk away and leave the egg soaking for too long... After etching the egg with vinegar, I scrubbed the egg ever so gently with a baby toothbrush to help remove the dissolved bits of eggshell. I recently switched to a baby toothbrush because my old scrub brush was a little too effective and removed some of the wax on previous eggs. After the scrubbing, the background was a bright white. I decided to dye the egg darker to better camouflage some of my wobbly wax lines (as small mistakes seem to really pop out on a white background). I then dyed the background black, which came out as gray. It's not always possible to get a deep rich color after vinegar etching, particularly with duck eggs. For some reason, this egg made me think of peacock feathers. I'd like to try making a feather design in a future pysanky egg.

Monday, March 17, 2008

another goose egg

This weekend I spent a long time working on a large goose egg pysanky that turned out to have an inch-long crack right through the hole at the end. I didn't even notice the crack until the egg was halfway finished, and blue dye began collecting in the crack edges. Goose eggs have very strong and thick shells compared to regular chicken eggs, and they seem to take dye more reliably than duck eggs. Hopefully the crack will not spread further through the shell after it is varnished. This design was abstract in nature and used 7 colors (turquoise, blueberry, navy, violet, apricot gold, lime, orange). I got to practice making my wax lines smooth, straight, and evenly spaced, a skill that I'm finding to be a challenge. The first photo shows the egg during the wax application; the second set of photos show the egg after the wax was removed. I still need to apply some polyurethane varnish to bring out the colors and make the surface smooth and shiny.

Tuesday, March 11, 2008

green leaf pysanky egg

I haven't had much time to work on pysanky eggs recently, in part because my mom was here visiting us until yesterday and also because I got obsessed with reading The Golden Compass. The last egg I posted on thing-a-day in February had a green abstract leaf design. This is the finished egg after several further iterations of dying and waxing. Unfortunately I dropped the egg while I was cleaning off the wax. It survived the fall mostly intact, but there is now a small web of cracks slightly visible on one side of the egg. I will eventually varnish it and use it as an ornament on our egg tree.

Thursday, March 6, 2008

hello, world!

we (sukogirl, robinde, and cignoh) have created this blog as a place to post our creative projects, works in progress, ideas, and thoughts. the three of us participated in thing.a.day 2008 in february and really enjoyed it, so we wanted to continue to post and share our work... here are our thing.a.day posts: